
My Elements :
Design clearer, more engaging Moodle course pages
My Elements helps you turn a Moodle course into a clearer learning path. Add content blocks directly in your browser to make pages easier to scan, instructions easier to follow, and the next step easier to spot, without code or admin rights.
Why plain Moodle pages hold students back?
Moodle gives teachers reliable places to write, share resources, and create activities. But strong material can still lose clarity: a page becomes a long read, an assignment brief turns into dense instructions, or a course section fills up with files, resources, and activities that all look the same.
When information isn’t visually separated, students lose the context that connects one item to the next, and struggle to find what matters or understand what to do next.
My Elements adds a content design layer directly in your browser: visual structure and clear landmarks on top of the content you already write, without changing your Moodle site or waiting for a server-side plugin.
Some teachers just want a course page that looks better, and that's a good enough reason to start
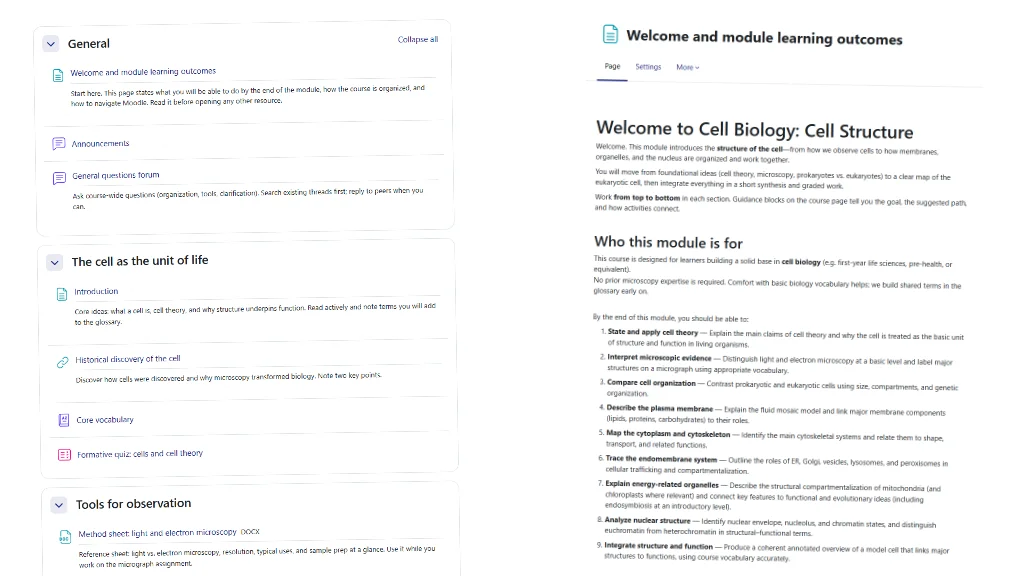
Not everyone opens My Elements to fix a pedagogical problem. Many simply want a page that looks less plain than a wall of text and links, and that’s a perfectly good reason on its own.
A page that looks more considered tends to read more clearly too: color, spacing, and visual variety help students take a course seriously before they’ve read a single word of it.
Whatever gets you started, a teaching problem or simply a better-looking page, the result is the same: a clearer, more structured course.
The problem with plain course pages
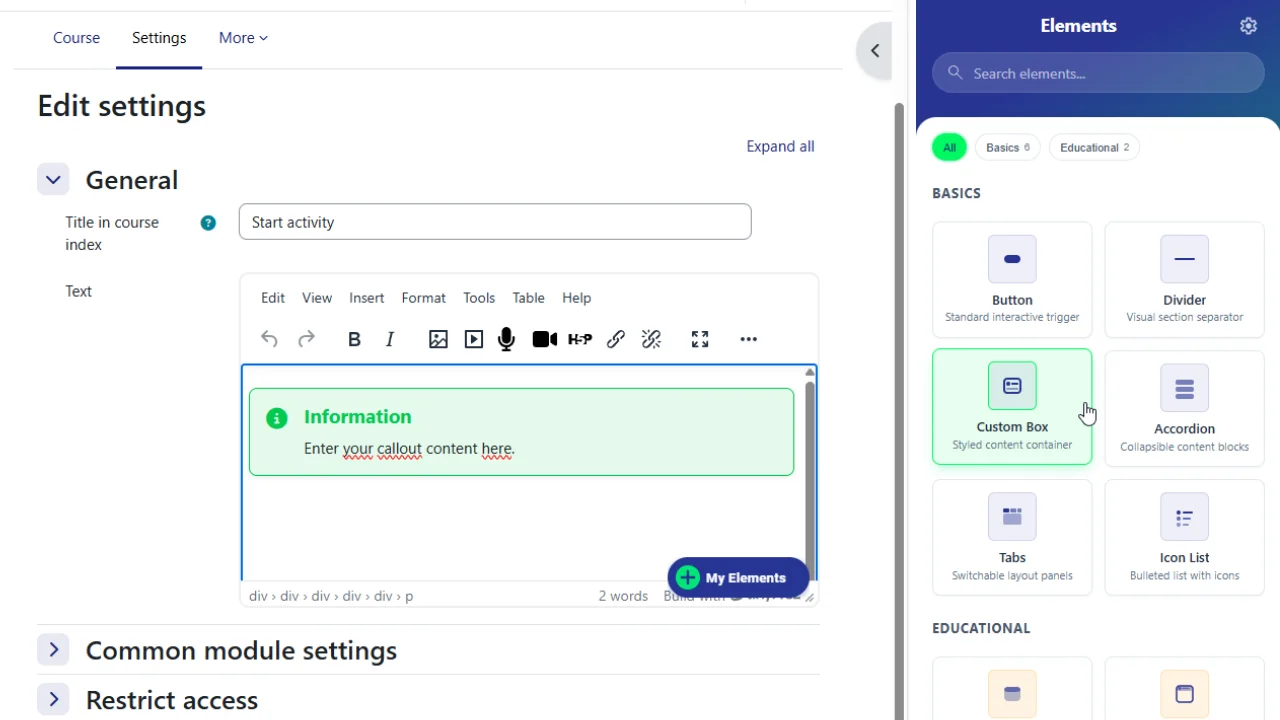
Editor limits that freeze good ideas
Moodle’s text editors handle writing well, but not tabs, accordions, callouts, or activity cards without code or an admin plugin.
My Elements adds those content blocks in your browser. No server install, no admin rights.
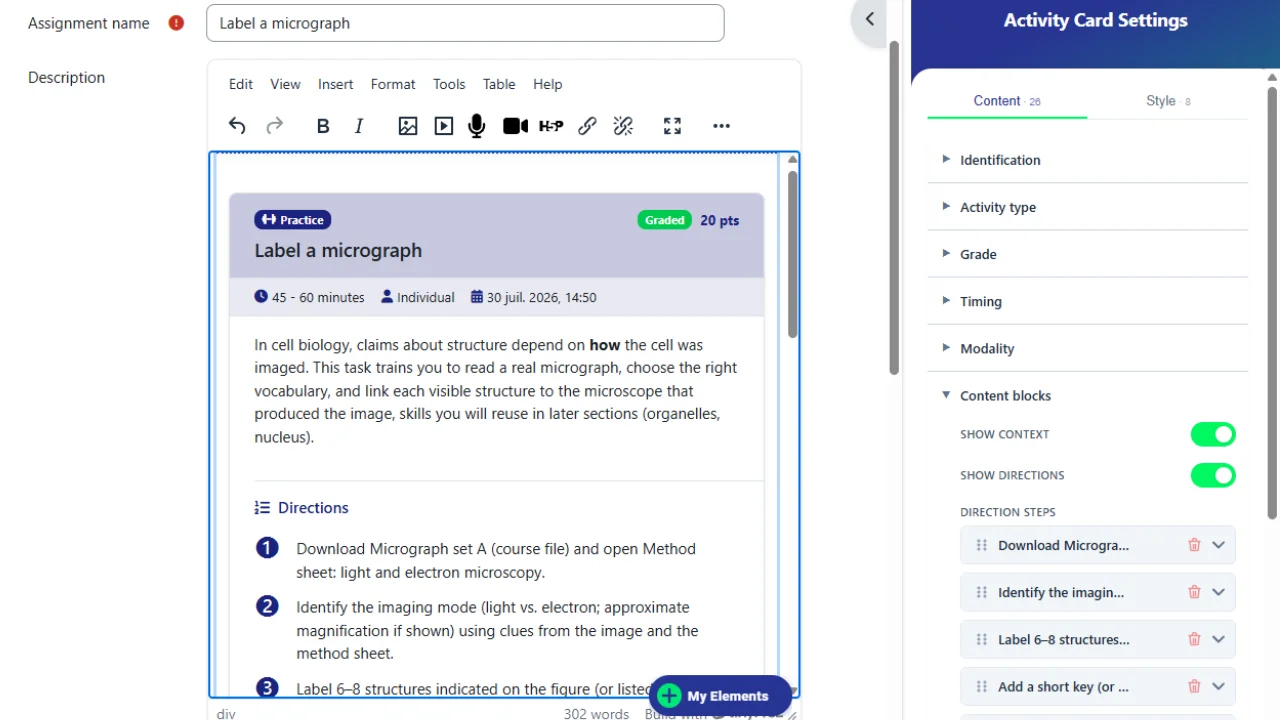
Low student engagement with plain text
A wall of plain text weakens scanning and attention, even when the material is strong.
My Elements breaks long pages into readable sections and clear landmarks so students see what matters first.
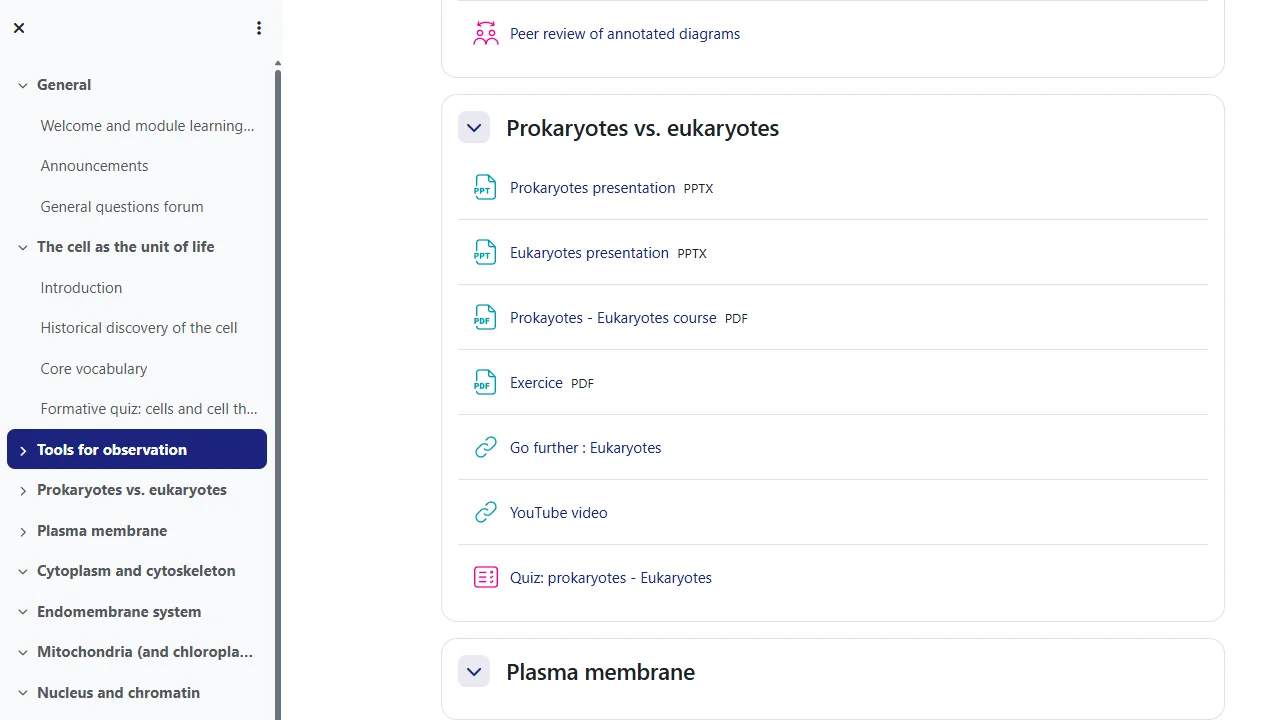
Moodle reduced to a file repository
When a course is mostly PDF links and plain labels, Moodle feels like a shared drive instead of a learning space.
My Elements helps you turn that list into a structured course page students can actually follow.
Time lost on manual workarounds
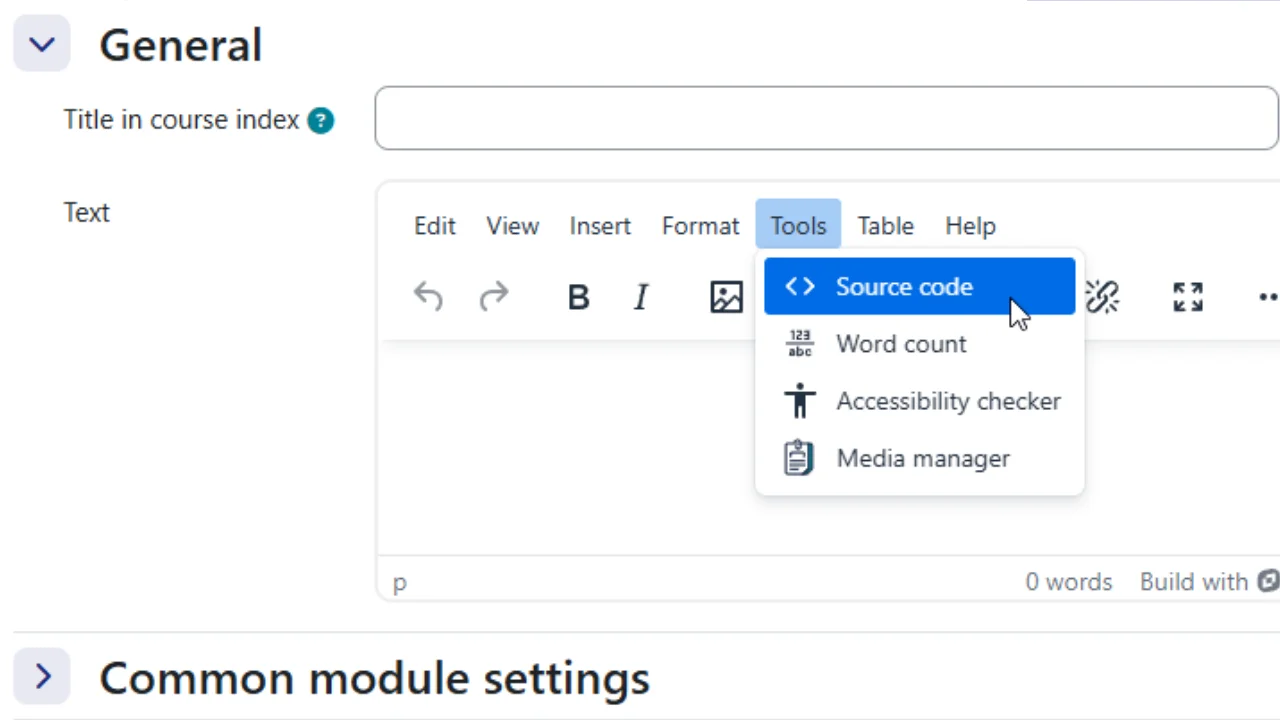
Teachers lose hours hunting HTML, fixing broken pastes, and rebuilding the same blocks course after course.
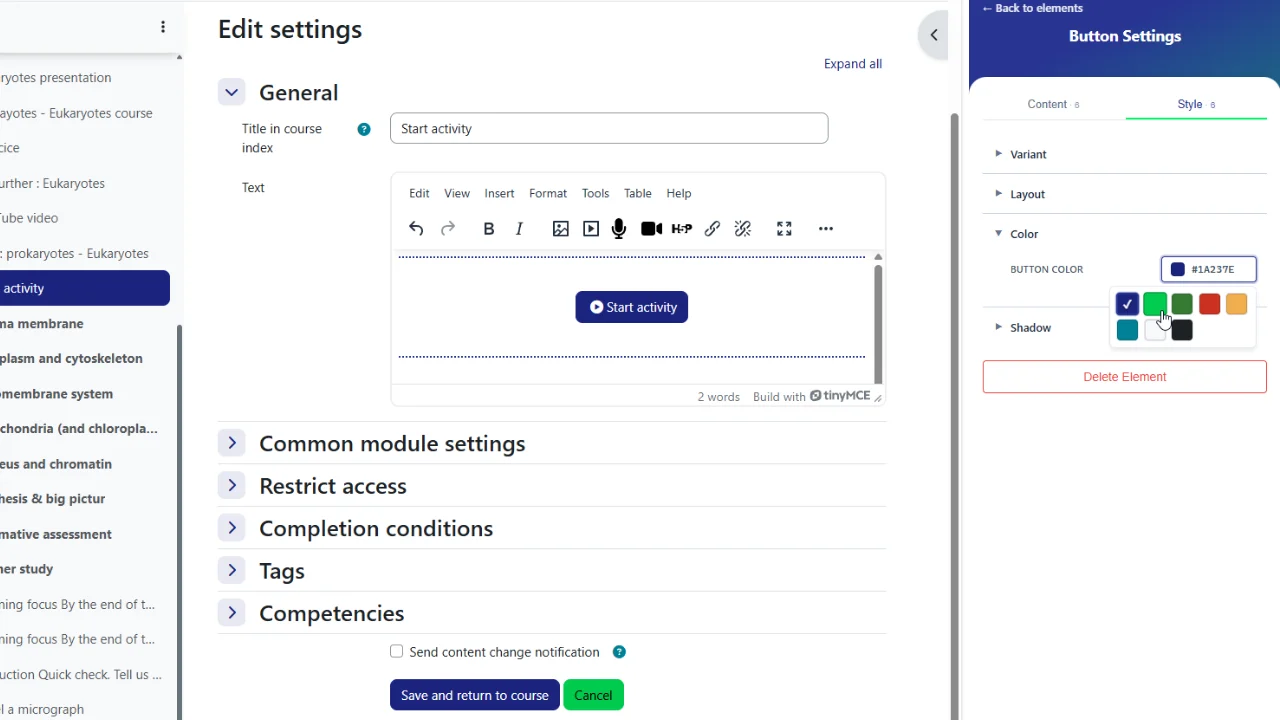
My Elements cuts that loop: configure once in the side panel, insert, and edit later in one click.
Pages that clash with the institution’s look
Forum snippets often break campus colors and spacing, so pages look out of place next to the rest of Moodle.
My Elements builds blocks that match your institution’s style automatically.
Features: Your Moodle content, designed your way
Works where you already write
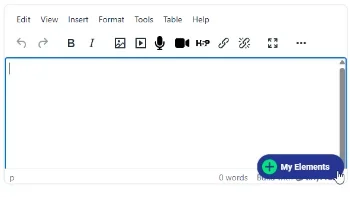
Getting started should not feel like setup work. My Elements detects Moodle’s text editors automatically and shows a floating button whenever you’re editing a course page, a text and media zone, an activity description, or any other editable zone. Click it, and the side panel opens with your content blocks.
No configuration, no extra toolbar to learn first: when you’re not editing, the button and panel stay out of the way.
How it works:
- Open any Moodle page where you can edit text.
- Start editing as you usually do.
- A floating button appears once an editor is ready. Click it to open the side panel.
- Choose a content block, set your options, and insert it into the page.
- Keep writing or click an existing block later to refine it.
You can also set how the panel opens, where the floating button sits, and whether deletions need a confirmation. So, the tool follows your habits, not the other way around.
This makes My Elements easy to adopt, even for teachers who do not want another system to learn.
Ready-to-use content blocks
Once the side panel is open, My Elements gives you a library of content blocks built for real teaching pages.
Some blocks are explicitly pedagogical, others are the basic building blocks of a clear page, and they still serve teaching.
You pick a block, set the text and options in the side panel, and the block appears ready in your Moodle editor.
You can add:
- Buttons – clear calls to action that send students to an activity, a resource, or the next step in the course.
- Dividers – visual breaks that separate topics, weeks, or sections so a long page feels paced instead of endless).
- Accordions – collapsible sections ideal for FAQs, definitions, or optional detail without flooding the page.
- Tabs – side-by-side chapters so program, assessment, and resources stay on one screen without endless scrolling.
- Icon lists – scannable lists for prerequisites, learning outcomes, or step-by-step instructions.
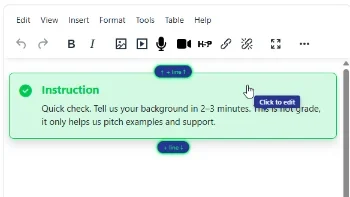
- Callouts – short tip, warning, info, or success boxes that highlight what students must not miss.
- Activity cards – structured assignment briefs with instructions, criteria, and deadlines in one readable block.
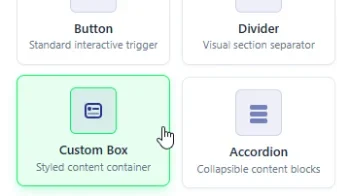
- Custom boxes – colored content frames you shape to your message when you need a stronger visual landmark.
- …
Each block is meant to answer a classroom need: guide attention, cut cognitive load, and turn a wall of text into a page students can actually follow.
Customize every block without code
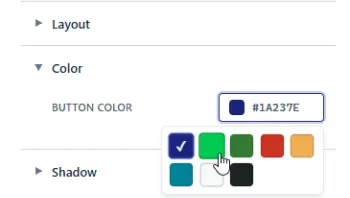
Ready-made blocks only help if you can shape them to your course. In the side panel, each element opens a simple set of controls so you decide what students see and how it looks without touching HTML or CSS code.
You can adjust:
- Content – titles, body text, links, and rich text inside each block (including images and lists where the block allows it).
- Structure – add, remove, or reorder lines in multi-item blocks (accordions, tabs, icon lists, activity cards), and choose options such as which accordion section opens first.
- Icons – pick icons that match the message (prerequisites, tips, next steps) from the icon set available on your Moodle site.
- Style – choose a visual variant, layout, colors (campus palette by default, or your own), borders, shadows, size, background, and spacing, so each block fits the role you give it on the page.
- Optional details – turn borders, shadows, or extra titles on or off when you want a lighter or stronger emphasis.
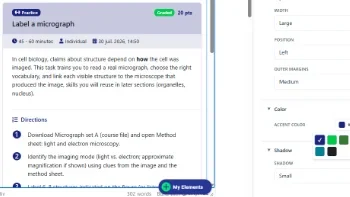
Pedagogical blocks, like activity cards, carry a few extra fields suited to their teaching role. An activity card, for instance, can surface a deadline, criteria, resources, and a call to action alongside its core content.
The point is not endless decoration. It is controlled personalization: enough options to make a page scannable and on-brand, simple enough that updating a block mid-semester stays a one-click edit.
Looks like your institution
A course page only feels professional when it matches the rest of the campus Moodle.
My Elements reads your site’s visual identity and applies it to every block you insert: colors, spacing, and overall look stay consistent with your institution’s theme.
You do not pick a foreign “skin” or paste third-party snippets that clash with the platform.
Edit Anytime. Nothing gets lost
Course pages evolve. My Elements is built for that reality.
Click a block you already inserted and the side panel reopens on that block’s exact settings. Change the title, reorder items, update a link, or adjust the style, then save your page.
For multi-item blocks (accordions, tabs, icon lists, activity cards), you can reorder or remove lines from the side panel without rebuilding the whole structure.
Teachers stop fearing “one more tweak will break the HTML,” and small improvements become part of normal course maintenance instead of a risky rebuild.
Speaks Your Language
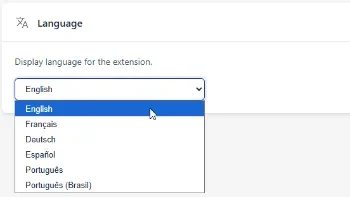
My Elements ships with an interface in six languages (English, French, Spanish, German, Portuguese, and Brazilian Portuguese).
The language can follow your browser or your choice, so international teaching teams and multi-campus trainers get the same clear workflow without waiting for an institutional plugin rollout.
Together, these features turn My Elements into a practical content design layer on Moodle: structure the page, match the campus look, keep editing safe, and stay focused on teaching.
Best Practices to design engaging Moodle content
My Elements makes a few simple habits possible in a way Moodle’s editors alone do not.
- Break a long course page into readable sections with dividers and short headings so students can scan before they dive in.
- Present learning objectives and targeted competencies in an accordion on the course home page, instead of a long plain block or a separate page activity that pushes everything else down.
- Turn a plain assignment description into a structured activity card with instructions, criteria, deadline, and a clear next step.
- Add a short FAQ at the top of your course with an accordion instead of answering the same email ten times.
- Highlight what students must not miss with callouts (tip, warning, info) instead of burying key rules in a long paragraph.
How Teachers use My Elements
Elena: From PDF dump to a real course home page
Elena used to open each term by uploading slides and readings as file links. Students landed on a long list of PDFs with almost no guidance.
With My Elements, she builds a true module home page: a short welcome callout, an accordion for learning objectives and competencies so they stay visible without filling the screen, an icon list for prerequisites, and tabs for program, assessment, and resources.
In under ten minutes, the course stops feeling like a shared drive and becomes a space students can actually follow.
Priya: A course page that finally looks like she made an effort
Priya trains new hires in a corporate compliance program, and her course content was always solid, but the page itself looked plain next to the polished onboarding materials her colleagues in marketing produced.
She didn’t have a teaching problem to fix, she just wanted the page to look like the effort she puts into the training.
She adds a custom box for the welcome message in her company’s brand colors, callouts to highlight key policies, and dividers between modules. Nothing changes pedagogically, the page simply looks like it was made with care, and trainees notice.
Camila: A complete assignment brief students can act on
Camila runs a multi-week group project and used to paste a long assignment description that students skimmed and then emailed about.
She turns that brief into an activity card: instructions, criteria, deadline, group size, resources, and a clear submit button in one structured block. When she also needs a partner module or a short intro video outside Moodle, she adds primary and secondary buttons that open those links cleanly.
Students see expectations at a glance. She updates the deadline mid-term with one click on the same card.
Noah: Breathing room inside a dense explanation
Noah teaches a theory-heavy unit where the reading is strong but hard to scan.
Instead of one unbroken wall of text, he inserts tip, warning, and success callouts at the moments students usually get stuck, and dividers between major blocks so the page has a clear rhythm.
The material stays the same.
The page now paces attention so learners can spot what matters without losing the thread.
Sam: A living FAQ that cuts repeat emails
Sam coordinates a large module and used a Moodle forum for common questions, but students almost never opened that activity. So the same emails kept coming every week.
On the course home page, he inserts an accordion FAQ instead: six common questions, richest answers first, first item open by default, right where students already land.
When a new question appears, he clicks the block, adds a line in the side panel, and publishes.
No HTML, no rebuild.
Daniel: Safe edits mid-semester, no broken HTML
Daniel already had a custom summary box on his course page, but a typo and a weak color made him hesitate to touch it.
He clicks the block, the side panel reopens on its exact settings, he fixes the text and style, and saves. Nothing else on the page breaks.
Small improvements become normal course maintenance instead of a risky rebuild.
Install in minutes, start designing right away
My Elements is designed to be useful immediately. You do not need admin rights, technical setup, coding skills, or changes to your Moodle platform to start using it.
How to get started ?
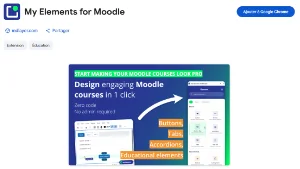
Install the extension from the Chrome Web Store.
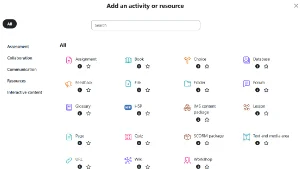
Open Moodle and start editing any course page, text and media area, or activity description as you usually do.
Click the My Elements button that appears in the editor, pick a content block in the side panel, set your options, and insert it into the page.
From installation to your first structured block, the setup takes only a few minutes. That makes My Elements especially practical for teachers and trainers who want clearer, more engaging Moodle pages without a technical project and without waiting for an institutional plugin.
Students see the improved layout automatically. They do not need to install anything.
Pricing and plans
Free
-
Full library of content blocks
-
Unlimited use on your Moodle courses
-
Automatic match to your institution’s look
-
Edit anytime without losing your content
-
Interface in six languages (English, French, Spanish, German, Portuguese, and Brazilian Portuguese)
-
No admin rights and no server-side install
-
Private by design. No course content sent to external servers
Compatibility and Privacy
My Elements works as a browser-side content design layer. It improves how you build Moodle pages without modifying your institution’s Moodle installation.
Works with current setup
Browsers
Chrome, Edge, Brave, Opera, and Vivaldi.
Moodle text editors
TinyMCE and Atto (the standard editors shipped with Moodle)
Moodle environment
Standard Moodle installations, no plugin required
Who needs the extension
Teachers and trainers who edit content. Students see the result with no install
Private by design
Local settings
Your extension settings stay in your browser environment.
Nothing leave your browser
No course content or student data is sent to MDLayer's external servers.
Save like any edit
Blocks you insert are saved in Moodle like any other content you write in the editor.
Institution stays in control
Your institution’s Moodle platform, theme, and courses remain under institutional control.
Sharing this with your IT department?
My Elements needs no extra access to your Moodle instance and installs nothing on the server. It only works inside the editor windows teachers already use.
Permissions and data handling are publicly declared on the Chrome Web Store listing, and can be reviewed again anytime after installation from the browser’s extension settings.
Because each teacher installs it individually, there’s no rollout project or central configuration to plan. Adoption can stay opt-in, course by course.
My Elements does not replace Moodle’s editors. It adds design tools when you edit, then steps aside.
Frequently Asked Questions about designing Moodle content
Do I need administrator rights to use My Elements?
No. My Elements is a browser extension, so teachers and trainers can install and use it without asking their institution to change anything. It works independently of the Moodle installation and does not require admin access or a server-side plugin.
Do I need to know how to code?
No. You choose a content block in the side panel, set the text and options, and insert it into the page. My Elements is built for teachers who want clearer course pages without writing HTML or CSS.
Do students need to install anything?
No. Only teachers and trainers who edit content install the extension. Students see the improved layout automatically in the course, with no install and no extra account.
Does it work in both of Moodle’s standard text editors?
Yes. My Elements works the same way in TinyMCE and Atto.
Does My Elements work with any Moodle course format?
Yes. My Elements works inside the text editors themselves, so it doesn’t depend on how your course is laid out. Whether your course uses the standard topics format, one section per page, or a grid layout, content blocks work the same way in any editable zone.
How can I make my Moodle course page look nicer?
Content blocks are the fastest way: dividers, callouts, and custom boxes add color, spacing, and visual variety without touching code. Most teachers notice a real difference after adding just two or three blocks. The page looks better because it’s finally structured, not just decorated.
Is My Elements the same as H5P?
Not quite, even where they overlap, like accordions, they work differently. H5P content lives as its own resource, created and embedded separately from the page. My Elements works directly inside the text you already write in Moodle’s editors, no separate resource to create, no admin setup required. Many teachers use both: H5P for interactive activities, My Elements for everything else on the page around them.
Could using My Elements break anything on my course page?
No. My Elements only adds content inside the editors you already use. It doesn’t touch anything outside your own course pages, and has no effect on other courses, colleagues, or Moodle settings elsewhere on the site.
Will this match my institution’s visual identity?
Yes. My Elements reads your site’s look and applies it to every block you insert, so colors, spacing, and overall style stay consistent with your campus Moodle. You do not paste third-party snippets that clash with the rest of the platform.
Will my content still look right if my institution changes its Moodle theme?
Blocks are built to follow your site’s current visual identity when you create or update them. If the institution refreshes its theme, open a block, adjust style options in the side panel if needed, and save the page. Your course content stays editable; nothing is locked into a one-off paste.
Can I edit a block later without breaking the page?
Yes. Click a block you already inserted and the side panel reopens on that block’s exact settings. Change text, reorder items, update a link, or adjust style, then save. Small improvements stay part of normal course maintenance instead of a risky rebuild.
Can I export my settings?
Yes. From the extension options you can export your preferences as a JSON file and import them on another computer. Course blocks themselves remain stored in Moodle with your course content; the export covers your extension settings, not student or institutional data.
What happens if I uninstall My Elements?
Right-click the extension icon and choose “Remove from Chrome.” Only the local extension and its settings are removed. Content you’ve already inserted stays in Moodle like any other saved edit.
Is My Elements compatible with mobile devices?
No. My Elements is designed for desktop browsers, not mobile use. Mobile browser extensions have limited functionality, so the extension is intended for Chrome-based desktop or laptop browsers only. Students can still view the designed pages on mobile through Moodle as usual.